>

Prepare to be redirected to thebloominghydrangea.com!

This page is a time delay redirect, please update your bookmarks to my new location at thebloominghydrangea.com!

Showing posts with label playroom. Show all posts

January 25, 2011

Cloffice Wall

Well if you recall, a few weeks ago the hall closet looked like this:


We decided to make it into a "cloffice" and now it's turned into a giant playroom, cloffice, flooring project, which happens with every project, it grows bigger and bigger!
A few weeks ago I came across Emily's post over at Jones design company and fell in love with her "painted walllpaper." I instantly knew what the back of my cloffice would look like. Head over here for the tutorial! Here is my wall, just waiting for the shelves to be installed, hopefully tonight! It took me forever to trace the stencil on the wall, I think I used an entire pink pearl eraser before I had it just right. The easy part was painting it! Stay tuned for the finished project!


January 14, 2011

I've been busy!!! (Closet makeover!)

Wednesday night the hubs and I ran to Menards to buy some shelving for the playroom closets. It came to $106 with the brackets, 6 shelves and some scotch tape. (My kids are constantly stealing my tape and using it all up, drives me insane when it's time to wrap a gift and there's no tape!) Anyways...this morning I reorganized all the toys, reorganized my closets upstairs, painted both closets with a nice limey green color I picked out of the neighbor's paint store basement and quick painted the trim white. It's 12:13 am on Friday morning and I am beat!!!! But I couldn't wait to post the dramatic difference in the closets, so without further ado, here they are!!!

BEFORE

This was one of the playroom closets, I could only take one picture because I think the other one was blocked by a bunch of toys.  It pretty much looked like this on the inside as well.


This is the hallway closet where we stored crafts, games and puzzles.  Usually it doesn't look like this but after Christmas presents, three birthdays, winter break with 4 kids home all day, one of them being a toddler, well you can imagine why it looks like this.


This is the shelving we were using to store the toys on.


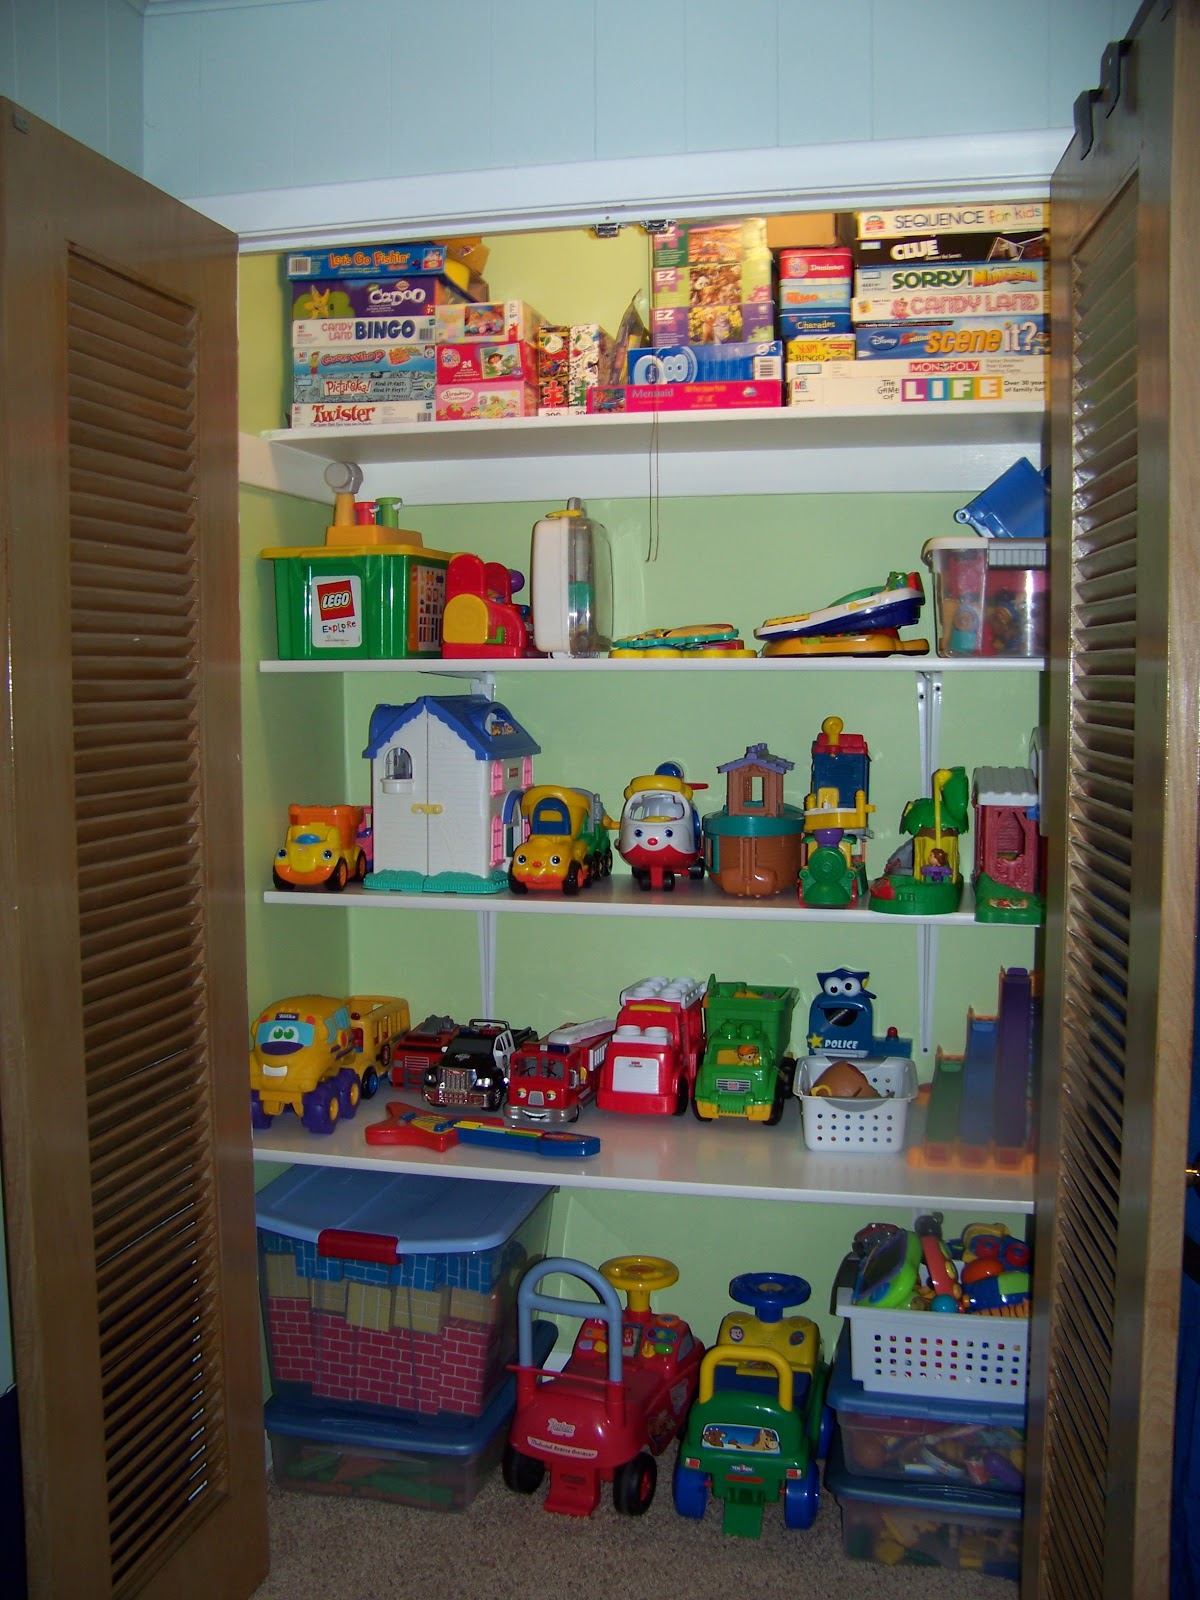
Here it is today after a LOOONNNNGGGGGGG day of painting, purging and reorganzing!


I am hoping to get 2 or 3 more clear bins because I like when the kids can see what's inside.  I am also planning to put labels on the bins but I'm just to tired for that tonight!


The empty toy shelves...such a beautiful site.  The books on top will be going on a bookshelf which all the kids will be able to reach.  It could be a bad thing with a 20 month old running around, I'll let you know how that works for me.  I am also considering some cute ideas for books on the wall so we'll see. 


This is the hall closet where we are going to be making our "cloffice" or closet office.  Mr.A's guitar usually goes in another closet but that closet is next on the purging/reorganizing list so I thought I'd just leave it here, along with the few lonely items on top.  I also reorganized 3 closets in our bedroom today as well but I'm saving that for another post.


I'm so happy with the way the closets turned out and it only cost us $100.  The paint was free, we already had all the bins and toys!  :)  Maybe you'll be inspired to do your own little closet makeover!
Stay tuned as we give the playroom a face lift and also get to work on the office closet or "cloffice."

I linked up at the following places....


http://www.beneathmyheart.net/2011/01/closet-makeover-linky-party/


January 6, 2011

2011 House Goals or Wishful Thinking?

The Nester just posted on her blog 2011 Home Goals for her home. It's so nice to see other bloggers who have beautiful homes still have those spaces that aren't perfect and have places that they would like to work on.
Mr.A and I sat down last night to decide what project we were going to tackle next so we could figure out the budget and all the boring stuff that I don't like figuring out.   If it was up to me, we'd just dive right in and figure all that out later. Good thing Mr.A is around to keep me somewhat grounded.
So I am going to post our goals for our home this year as well and hopefully by December 2011 I can look back and see some of these accomplished!

Install the dining room corner cabinets
Paint the cabinets
Paint over the brown on the bottom and possibly a new color on the top as well
Reupholster the dining room chairs.
I'm still not sure if I'm going to keep the table cherry or repaint it, possibly white.
Another thought is adding some board and batten to the wall but that might be too much with the cabinets, we'll have to see as we go!


Next on the list is the hall closet/playroom.

With four children we have a lot of games, puzzles, coloring books, craft type stuff.  This closet is usually a little more organized but with Christmas presents combined with Christmas break and a toddler that loves to get into stuff, the closet is looking less than stellar.  I'm embarrassed to put this picture out there but I'm just keeping it real.


We hope to turn this closet into an office, like this one from Country Living:


Which leads to the playroom and all it's glory.  We have two closets, one is pictured below, looking a mite bit scary.  Again, just keeping it real, it's 11pm and I don't have the energy to make it look pretty right now. 

Install shelving units in the two closets for toys, games and playroom crap stuff
Move the bookcase/shelving units out of the playroom
Replace the carpeting with some type of flooring that is not carpeting  as the dog thinks it's fun to pee on carpet
Paint the doors white or replace them with white doors
Install window trim and paint the trim around both windows, a project left over from this summer when we replaced the windows in the playroom
Repaint the playroom and get rid of the curbside couch, make it have more of a hang out/kid friendly feel to it

Rip out the desk between the two closets and make a cute little bench seat


On a side note, I think I clean this desk off about once a week but really it's just a catchall and the kids' computer area which doesn't get a lot of love during the week.  Don't judge me, k? 
Moving on from that scary mess......

When we bought this house, it came with a lovely white and green diamond patterned tile entryway floor.  It was as slick as ice and if you made the mistake of stepping on it with wet shoes, you were in for a wild ride!
One day while using my floormate I hit the tile and a little green diamond popped up off the floor.  I was able to pick up almost all the tiles by hand without any effort.  A few actually were grouted to the hardwood floor but about 80% came up with ease.  The floor has remained like this for about a year and a half now.


I would love to refinish this but that might have to wait until we refinish the living room and dining room floor as well.  So, not sure what we'll do right here but I'd like something done so it doesn't look so unfinished.

This is it for now, I have a ton of landscaping that I would like to accomplish this summer as well but it's kind of hard to show pictures of what I'd like to redo because everything is covered in snow!

There are more things I could put on here, like both bathrooms needing makeovers,  main floor laundry, figuring out what we are doing with our bedroom sitation (3 girls in one bedroom is just the beginning), knocking out the wall between the kitchen and the playroom which then would mean no office closet, refinishing the hardwood floors on the main floor, I could keep going but I'll just stop there!

I love my home but sometimes I feel like I"m always trying to improve it without stopping and just letting things be for a while.  I don't have a Country Living worthy house nor will I probably ever.  What I want most is a home that is safe, comfortable, inviting, warm, welcoming and inspiring.  A place for my family to think back on fondly when they are grown.   A place where they bring their teenage friends to hang out, their children to visit in and where they will always call HOME!  Unless of course I get the bug to move in a few years.  ;)

Thanks for checking it out and I'd love to hear from you!

I'm linking up at The Nesting Place.

September 10, 2010

New Project - Chalkboard for the playroom


I am so excited to share with you my very inexpensive project that I've been working on today.  We are working on making the playroom for the kids and one of the things I've been wanting to add is a chalkboard.  I mentioned this to a friend the other day and she said, "Wait here, I'll be right back."  She came back and had a can of black chalkboard spray paint in her can, brand new, never used.  She said, take it, I'll never use it.
When I first thought of what I would use for the board, I was envisioning some sort of plywood or hardboard with trim around it.  While at a garage sale yesterday I came across this picture for $4 and decided it would make a great chalkboard!  Mr. A wanted me to make sure the picture wasn't a priceless painting but by looking at it, I'm sure it's not. 


So I hauled this beauty off to the garage, sprayed some primer on it and also managed to get the first coat of chalkboard paint on while baby J was napping.  I am thinking of painting the frame a reddish color that is leftover in the basement from our front porch but we'll see what I do.  I can't wait to put this on the wall!


Sue, just for you I had Mr.A take a picture of the back of the chalkboard and here it is:


The chalkboard is done and my children have used it a lot in the past few days!  I tried to clean off all the chalk writing but we don't have an eraser so papertowel was my substitute.   This was a cheap and super easy project!  My kids love it and I loved making it for them.  I couldn't get the can of red paint open so for now it's green but that could change!
Garage Sale Picture:  $4
Spray Paint Primer:  $3
Total cost of project:  $7.00     The chalkboard spray paint was free but even if I had to purchase a can, I think it was also $3 at Wal-mart.  I also could've knocked a $1 off the picture but I was so excited I just bought it for the asking price.